
This is a campaign battle report of my first game in the Fulda Gap Campaign. Since I don't have a page for the Fulda Gap Campaign up yet, there are some things I need to explain about this battle report before I go on. First this battle report uses a lot of proxies. Most of my force is still not assemble and painted and even if it were, the campaign adds addition units neither had plan on buying. Next, the campaign has three unique rules that changes the normal game. While a default game is 100 points per side, the campaign maybe give either player an additional 25 points to expand their force. The opponent will not know about this bonus ahead of time. For this report the Soviet receive the addition 25 points while the US did not. Second, both sides have the use of off the table artillery. The artillery count as having unlimited range but will need a spotter to fire. To get this artillery a check needs to be passed after rolling for strike aircraft. The Soviets artillery count as a 6 gun carnation battery and will fire on a 4+ roll. The US get a 3 gun M109 battery with the copperhead upgrade and will fire on a 5+ roll. Both forces gets an additional observer. Lastly, both sides have a secret list of when addition aircraft will reinforce their army. The opponent has no idea when or how many aircraft will show up until it is announce. When helicopters show up, they stay for the rest of the game and count as apart of the rest of the force. Strike aircraft are automatic but are only available for that turn. If a player get strike aircraft in multiple turns, any destruction of aircraft does not carry over. That means if a player is getting 2 strike aircraft in turn 1, 3 and 4, that player will get 2 strike aircraft in turns 3 and 4 even if they were destroyed in turn 1. Now lets get into the battle report proper starting with the board

We got a map of where our battle was suppose to take place so we tried to make the battlefield resemble that map. What we got was very interesting. We didn't have much terrain overall but we did get 2 thin tree lines that bisected the board. The hill on the west side is actually a forest. We added trees to it later. The three hills on the top right were hills and also help sub-divide the board. Since tanks couldn't fit on top of the tree lines, we had the rule that if you were next to a tree line, you were counted as being in the forest and required a cross check. We both had the same idea of who would get the most benefit from the map. Who actually DID get the most big for their buck is a different story, which I will get into shortly.

Here is a picture of the entire Soviet force. I'm not sure what's what so I'm just going to list what is in it:
HQ T-72
T-72 x3 w/ mine clearing devices
T-72 x3 w/ mine clearing devices
T-72 x3 w/ mine clearing devices
BMP-2 motor rifle company (4x AK-74, 3x RPG-7, 4x BMP-2, 1x SA-14 Gremlin AA)
BMP-2 Scout x2
BMP-2 Scout x2
2S1 Carnation x3
2S1 Carnation x3
BMP-1 OP
BMP-1 OP (bonus from the campaign)
ZSU-23-4 Shilka x4
SA-13 Gopher x4
BM-21 Hail Rocket Launcher Battery x3
MI-24 Hind x6
Assault Landing Company (AK-74 x6, RPG-7 x4)
Frogfoot x6
In addition to this, Soviets got MI-24 Hind x3 to come in on Turn 1 from the secret list.

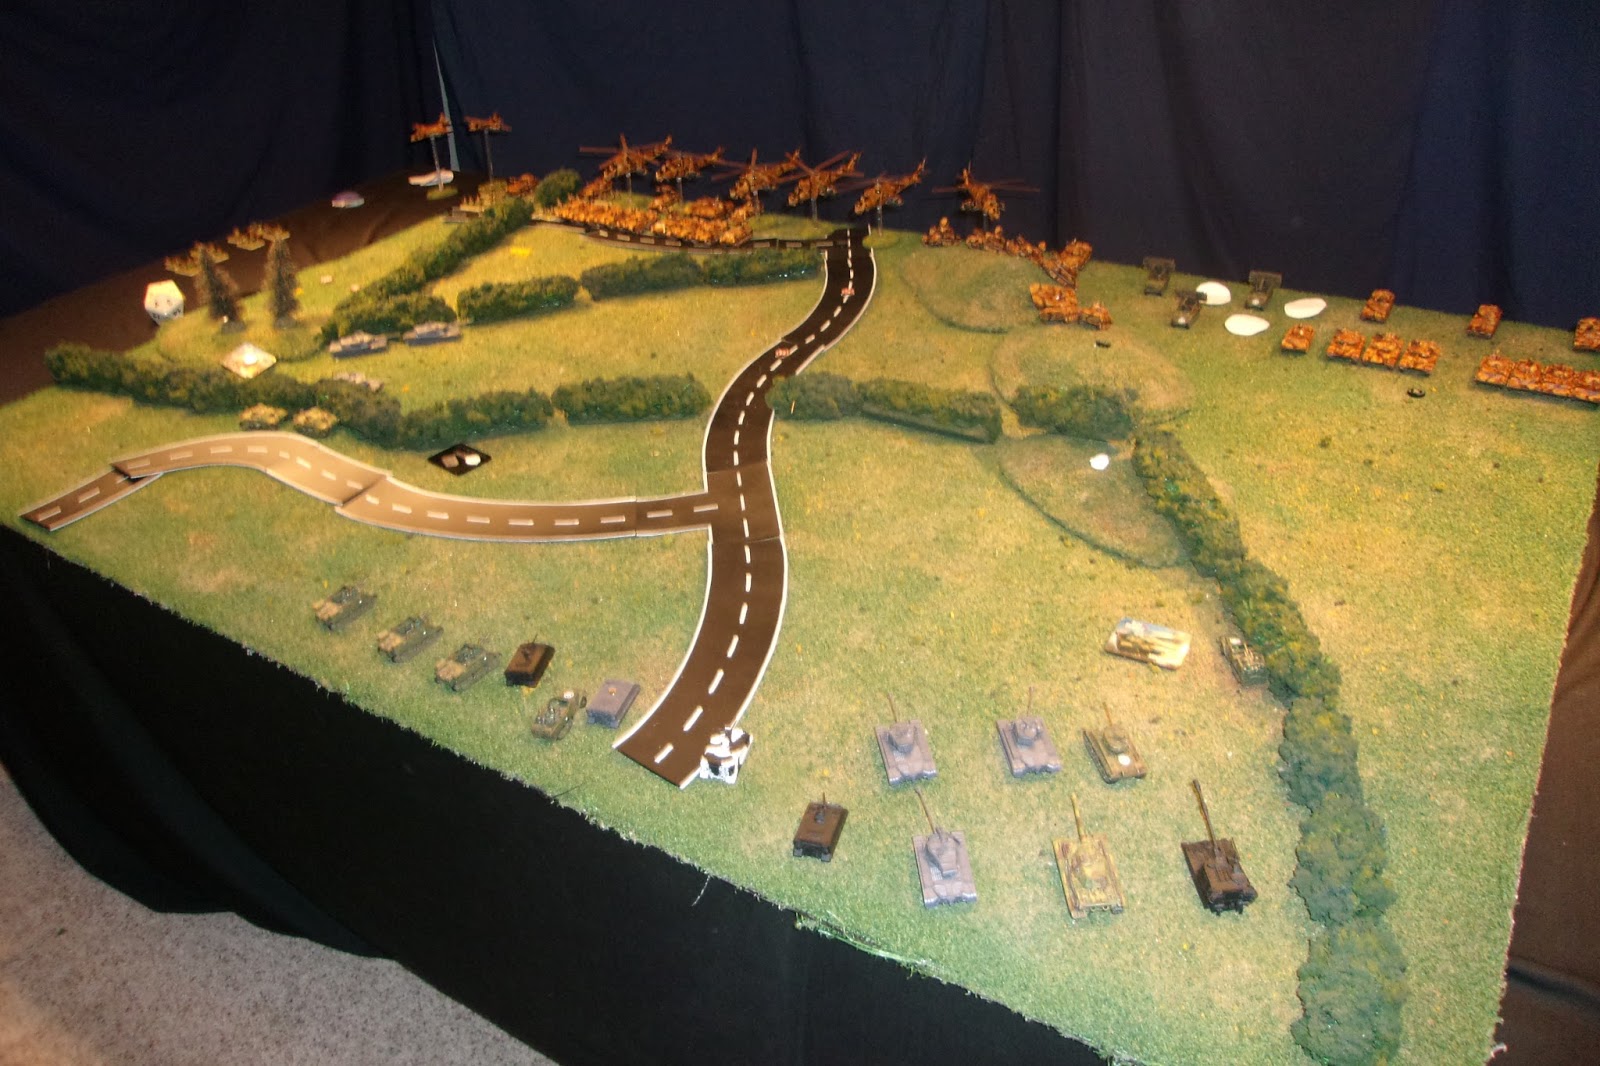
Here is a picture of the US force. It includes:
HQ M1 Abram (its the black one in front)
M1 Abrams x3 (right behind the HQ)
M1 Abrams x3 (right behind the HQ)
M106 x3 (proxies right behind the Abrams)
M901 ITV x2 (StuG proxies right behind the M106)
M113 FIST x2 (includes bonus one from campaign, next to the StuG)
M163 VADS x4 (the 4 M113 chassis)
A-10 Warthog x2
M109 x6 w/ Copperheads and Bomblets (the 6 vehicles in back, the black one is the actual model)
Mission
The rules of the campaign said we had to play a defensive battle with the Soviets attacking from the north/top of the map and the US defending from the south/bottom. The die roll was 4, which gave us Fighting Withdrawal. The key elements of this mission is that both side start with everything on the table with the defender getting to put one unit in ambush. I pick one of my Abrams unit place in ambush. If the Soviets control any of the three objectives at any time, they win. If the US can not lose by Turn 8, they win. One last point, starting on Turn 3 and every turn afterwards the US adds a "delay counter" or removes a unit depending on how many are left. The US gets to remove an objective on Turns 6 and 7.

Because my deployment zone was half the board and there is not much concerning terrain beside the tree lines, the Soviet scout's spearhead special rule was render useless. The Soviets only had an 8 inch deployment zone and the scouts could only extend that 4 inches behind the hills. Even then other Soviet units couldn't much beyond that because they were in clear view of my deployment zone (which counts as my teams for the spearhead rule). Nevertheless the Soviets greatly outnumbered me and had first turn.
Turn 1
The Soviets failed to get in their strike aircraft and off board artillery. Since none of his spotters were in a good position, Tracy move all of his artillery and observers up to get a better view along with most of his force. Some vehicles failed a cross check and bog down, which will be a running theme for the rest of the game. On the west side an unit of T-72 move up and shoot at the Abrams in the woods, destroying one. The six hinds had move behind those Abrams and finish the Abrams off. The ant-air fire from the Abrams, HQ and the ITVs took out a single before they shot. On the east side, the BMP-2 transports move up to near the tree line close the M109s. Three T-72s move up and fire on a FIST hiding in the woods. Tracy got a lucky 6 and blew the FIST up. The 3 hinds had moved behind those T-72s and would have also fired on the FIST if the tanks had miss.


Bottom of Turn 1, US failed to get in their strike aircraft but did get the off the table artillery. The secret list did give the US 2 A-10s to use on turn 1 so it was like it made its strike aircraft roll. The VADS moved up to put the 3 hinds into range and shoot them up, destroying 2. The FIST spotted for the 6 M109 to fire copperheads at the 5 hinds and knock two of those out the air. The heavy mortar leader spotted for the off-board artillery to drop a bombardment on the Shilka on the hill. Range in on them but only manage to bailed out a single Shilka. In retrospect, that was as good as destroyed since that Shilka never remount for the rest of the game. The A-10s avenged the FIST by destroying one of the T-72s that shot at it. More things fired this turn but nothing else landed.

Turn 2
Soviets got everything this turn. Strike aircraft, off board artillery and even the campaign gave Tracy an additional 2 Frogfoots this turn. Tracy loitered single Hind off the table to prevent him from losing the unit. The Soviets poured a lot of firepower into the ITVs and my HQ on the west side. 6 Frogfoots, 3 remaining Hinds (both of which stay out of range of the VADS), T-72s and more all fired. Only a single ITV got destroyed. It forced a morale checked but the remaining ITV passed. On the east side the infantry disembark and prepared to assault the M109s. The T-72s (and maybe something else) shot at the VADS, one got destroyed and a second was bailed out. A spotter for the off board artillery tried to range in on the M109s but rolled 2,2 and 1. The 2 Frogfoots fired on the remaining VADS but their anti-aircraft fire blew them out of the air. This made Tracy happy for now he can assault the M109s with his infantry. I think since .50 cal machine-guns is really only used to shoot at aircraft in our games, he forgot their normal rate of fire is 3. His men didn't fair well running into 18 shots. Half of the infantry was killed forcing the remaining men to fall back. At this point I'm thinking while the US held, things looks really bleak.


At this point I should say while I'm describing most of what the US did, I'm just highlighting the Soviet turn. The reason is that the Soviet just have so much stuff and most of what I'm leaving out is moving, failing cross checks or both. On the US turn the strike aircraft came in but the off board artillery did not. Since I was losing the west flank badly I brought my Abrams out of ambush to help protect the objective. Moving through the tree line, all three Abrams had to take a cross check and they all passed. Being face to face with the T-72s, the ambushing Abrams fired and destroyed enough tanks to force a check and caused that unit of T-72s to flee. The 6 M109 fired copperheads into the Hinds again but did no damage this time. So the ITV shot at them and took a Hind out. My HQ shot at the Shilkas, destroying 2 to force a morale check. A check they passed. The heavy mortals moved up to support the M109 from the infantry by giving them covering fire. Since some of the infantry was hiding behind the trees, they could sneak up on the M109s, preventing some their defensive fire. Of course I didn't moved the heavy mortal far enough so they couldn't help out anyways. One VADS moved up to contested the eastern objective. One M109 was right on the line to being able to contest so I wanted to make sure another vehicle was clearly within 4 inches. The A-10s was going to clean house on the eastern flank, but anti-aircraft fire got the best of them and they were shot down.

Turn 3
For Soviets turn 3 they got their strike aircraft in but not their off board artillery. The campaign gave the Soviets another set of 2 Frogfoots whom come in despite the previous set were destroyed. That gave Soviets back-to-back turns of having 8 Frogfoots in play. Everything on the west front shot at the Abrams platoon, including all 8 Frogfoots, and it was just barely enough to destroy them all. On the east coast the VADS got wiped out by tag team shots from a T-72 and Carnations' straight shot. Everything else over there shot at the M109s and bailed out half of them. I believe the infantry assaulted again and again got stopped by the .50 cal machine guns. Tracy decided to shoot his men so none of them were able to deny defensive fire.
For US they failed to get their off board artillery. Soviets now have infantry in the forest on the western front near the objective. This forces the US to get something over there to stay in the game. The HQ tries to move other there but fails its cross check and bogs now. Now the ITV has to move and it passes its check so it can now contest. On the east 2 M109 remounted while the third failed the check. Having 5 guns I split my shooting to do 3 copperhead shots into the T-72s over there, blowing them up, 2 straight shots into the Carnations and destroying 2 as well. This force a check on the Carnation but they made it. On the drive home I began to wonder if this was a legal move. I forgot artillery has a rule that if any gun fires a bombardment, the other guns either has to join the bombardment or they don't fire. Then again, copperheads is not a normal bombardment. Something I need to check out on the forums but in any case it didn't change anything in the game. I will explain why at the end.

Turn 4
Soviets did not get their 6 Frogfoot strike aircraft but they did make their off board artillery roll and over the screams of Captain Jack and myself, the campaign gave them another pair of Frogfoots this turn. On the east the M109 were essentially surrounded and was fired upon from all sides plus the off board artillery. The few that survived failed their morale check and fled. On board artillery bombardment ranged in and destroyed the remaining FIST and one of the heavy mortars. In the west, several shots fired into the HQ, with the Frogfoots delivering the killing blow. Captain Jack's final words as he heard jet engine toward his position were "Oh COME ON!" The Hinds sealed the deal by destroying the ITV.

The Soviets turn is now over but at this point nothing US can do to stop the game from ending. Tracy is controlling 2 objectives on both sides of the board and the only thing the US have left is 2 M106 heavy mortals. The campaign would have given me 3 Cobras on Turn 4 but it was too little too late. Even with the Cobras I thought there was nothing I could have done to change the result of the battle (I was wrong) and I was tried of getting my teeth kicked in. The only units the Soviets lost were 2 units of T-72s. The Soviets force was large enough to ignore one of those lost units for victory points, which means the Soviets won 5 - 2.
Summary
Let's start with the ending. I was quickly put in a bad place and had so many ways to lose. I was really close to being tabled and because of the mission would have eventually been force to remove at least one of my remaining units before turn 8. The reason M109 mistake, if it does turns out to be one, wouldn't have change anything was that I was going to shoot the T-72s no matter what and the Carnations made their morale check. Now if they failed their morale check then it would have change the game because that would make the Carnations the third unit destroyed which would change the final score to a 4 - 3. That also means that I should have played out Turn 4 because if the Cobra could have wiped out one unit, it would have affect the score. We almost never use victory points before so I was unaware how it work until after we quit and looked it up. By the end of the game I was emotionally drained. While Tracy had some really good rolls at key moments, his dice rolling was overall below average and down right sad at times. I think this gave me false hope in thinking of turning the game around. He just had too much stuff for me to overcome.
The terrain was extremely interesting as we would never setup a board like this on our own. We both thought it gave the US a stronger advantage but by the end of the game there is a debate to say the Soviets benefited more. You can say the US benefited more from Terrain in the east while the Soviets benefited in the west. Tracy had to us so much overwhelming firepower to remove the few models I had in the western woods. Then again, it was nearly 60 points worth of US so it probably should have been hard to remove them. With the lost of my first FIST, Soviets could use the tree line in the east to block all line of sight to them, allowing them to move up to the objective without being shot at.
I won't comment on the campaign rules until the campaign ends. I will go into more details about the system when I make the Fulda Campaign page. Despite the long odd I did enjoy playing most of this game. Coming into the game I had the feeling I was going to get creamed but the actual battle was closer than what the score says. One thing I did forget to mention in the report was that I got 4 minefields and they did play a minor role in the game. They are hard to see in the pictures but I put 2 on the road which I don't think help very much. The other 2 above the forest on the western edge. This greatly slowed down the Soviets infantry by making them go around the minefield. They probably could have gotten to the objective in a turn or 2 sooner than they did. In any case this was nearly an overwhelming victory for the Soviets.
No comments:
Post a Comment